With MaxBulk Mailer 8.6.7 we added support for DKIM. DKIM (DomainKeys Identified Mail) is a method for validating the authenticity of email messages. When you send an email with DKIM activated, it is signed using a private key and then validated on the receiving mail server (or ISP) using a public key on your domain DNS record. DKIM is optional but quite recommended since having emails that are signed with DKIM appear more legitimate to your recipients and as a result, they are less likely to go to Junk or Spam folders. In addition to verifying the authenticity of an email message, DKIM also provides a way for ISPs to track and build a reputation on your domain’s sending history. How to setup DKIM in MaxBulk Mailer?
So, in order to use DKIM first, you need a domain and you have to use an email address from that domain as the sender of your emails. For example, our domain is ‘maxprog.com’ and our address ‘support’ belongs to that domain. If you don’t have a domain and/or use a Gmail/Hotmail/yahoo address, for example, this is not for you.
In addition, when adding a DKIM record it is also a good idea to add SPF and DMARC records. I will talk briefly about that below but I will write a complete post about email deliverability later.
How does DKIM work?
The process works like this: You publish a cryptographic public key as a specially-formatted TXT record in your domain’s overall DNS records. When a mail message is sent with MaxBulk Mailer, the software generates and attaches a unique DKIM signature header to the message. DKIM allows you to associate your domain name with your email messages, thus vouching for their authenticity. You create the DKIM by signing the email with a digital signature. This signature is located in the message’s header.What is SPF?
Another quick method to improve your email delivery rates is to incorporate SPF, or the Sender Policy Framework into your DNS settings. SPF is an email validation protocol designed to detect and block email spoofing by providing a mechanism to allow receiving mail exchangers to verify that incoming mail from your domain comes from an IP Address authorized by you. As DKIM, SPF is not required but highly recommended.You will find more information on SPF here. Don’t worry, I will write a post about SPF later.
And what about DMARC?
A DMARC record is a record where the DMARC rule sets are defined. Once SPF and DKIM are in place, you configure DMARC by adding policies to your domain’s DNS records in the form of TXT records (just like with SPF or DKIM). You will find more information on DMARC here. I will also write a post about DMARC and email deliverability later.
Where do I create a DKIM record
Best if you use this DKIM wizard. Just enter your Domain name and a DomainKey Selector of your choice. Then click on ‘Generate’. You will automatically get the formatted DKIM DNS record you need to add to your DNS server. That record contains your public key. The public key is the one that has to be added to your server DNS record. Next you will find private key. The private key has to be added to the MaxBulk Mailer DKIM panel.
As an example, this is what our DNS record looks like:

You can see the SPF record followed by DMARC and finally the DKIM record (the last two entries).
How to setup DKIM in MaxBulk Mailer
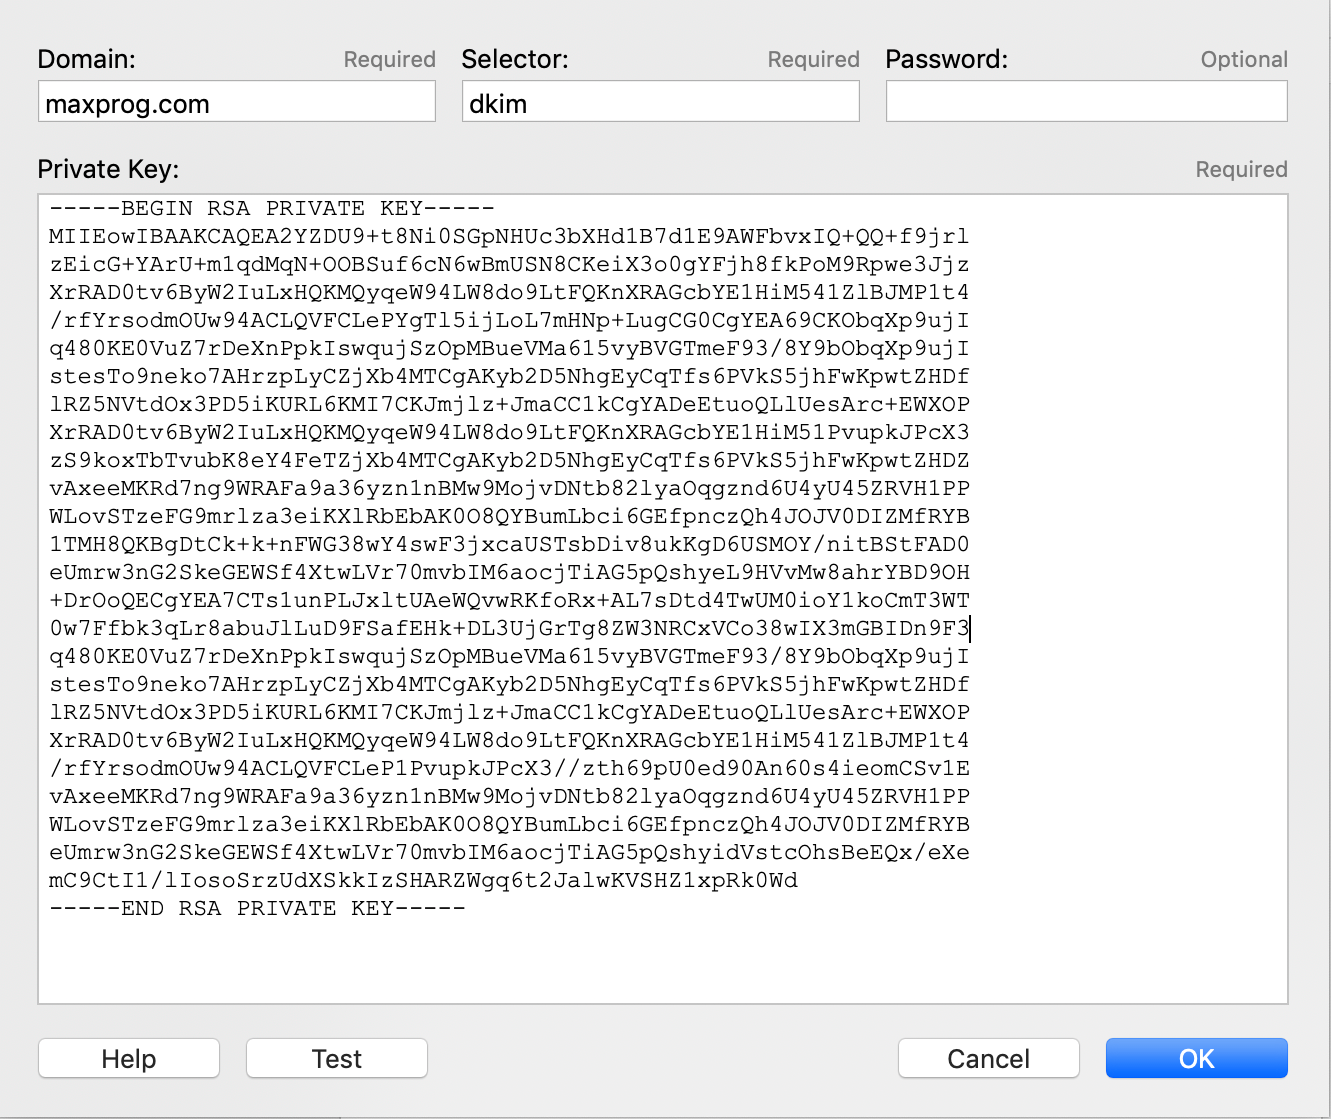
You have to enter the DKIM data into MaxBulk Mailer using the DKIM window:

Here you can see that ‘Domain’ contains the domain name, ‘Selector’ the selector we have chosen in the DKIM wizard and finally the private key, as is, including ‘—–BEGIN RSA PRIVATE KEY—–‘ and ‘—–END RSA PRIVATE KEY—–‘. The password field can remain empty for the moment.
Checking the DNS record
You can check whether your DKIM DNS record has been properly updated with the Dig command on macOS (with the Terminal app) or with nslookup on MS Windows (with the command prompt). Proceed this way:
macOS > dig [selector]._domainkey.[domain] TXT
Windows > -type=txt [selector]._domainkey.[domain]
In our case since our selector is ‘dkim’ and our domain ‘maxprog.com’:
macOS > dig dkim._domainkey.maxprog.com TXT
Windows > nslookup -type=txt dkim._domainkey.maxprog.com
You should get your DKIM record in the ‘ANSWER SECTION’ of the DIG response. With nslooup the response is the record itself. Note that it can take a few hours for your DNS changes to be propagated so be patient.
You can also verify your DKIM record with those user-friendly tools:
– DKIM Key Checker Recommended!
– Network-Tools.com
– WhatsMyIP.us
– DKIM Core Key Check
Checking the DKIM signature
It is very easy to validate your DKIM settings, indeed, just click on the MaxBulk Mailer DKIM window ‘Test’ button. The software will check everything, your DKIM DNS record, and the private and public keys. MaxBulk Mailer will actually sign a dummy message and then try to validate it with the server. If you are successful then you can be sure that all your outgoing messages will be signed!
More information on DKIM:
– DKIM Explained
– DKIM.org – Frequently Asked Questions
– What are DKIM records?
– Protecting Your Brand From Phishing: How to Create a DKIM Record
– DomainKeys Identified Mail
– Email authentication
– Privacy-Enhanced Mail
– What Is DKIM? Everything You Need to Know About Digital Signatures
– Understanding SPF and DKIM to Improve Email Deliverability
So this is how to set up DKIM in MaxBulk Mailer. All the information above can be quite intimidating for most people, I know that so I recommend you to contact your server support. They should be able to help you with DKIM. They are used to handle that.
